

 |
| Opening shot from establishing cam |
 |
| In the middle of the path the establishing cam is on, door opens before it comes in |
 |
| End of the establishing trail path - rocket will shoot out |
 |
| RocketCurve camera, captures the rocket as it travels on its path |
 |
| Same RocketCurve camera before the rocket leaves frame |
 |
| RocketStop camera near the end of the rocket's journey. Fixed the sky after these pictures so it wouldn't look as grainy. |
 |
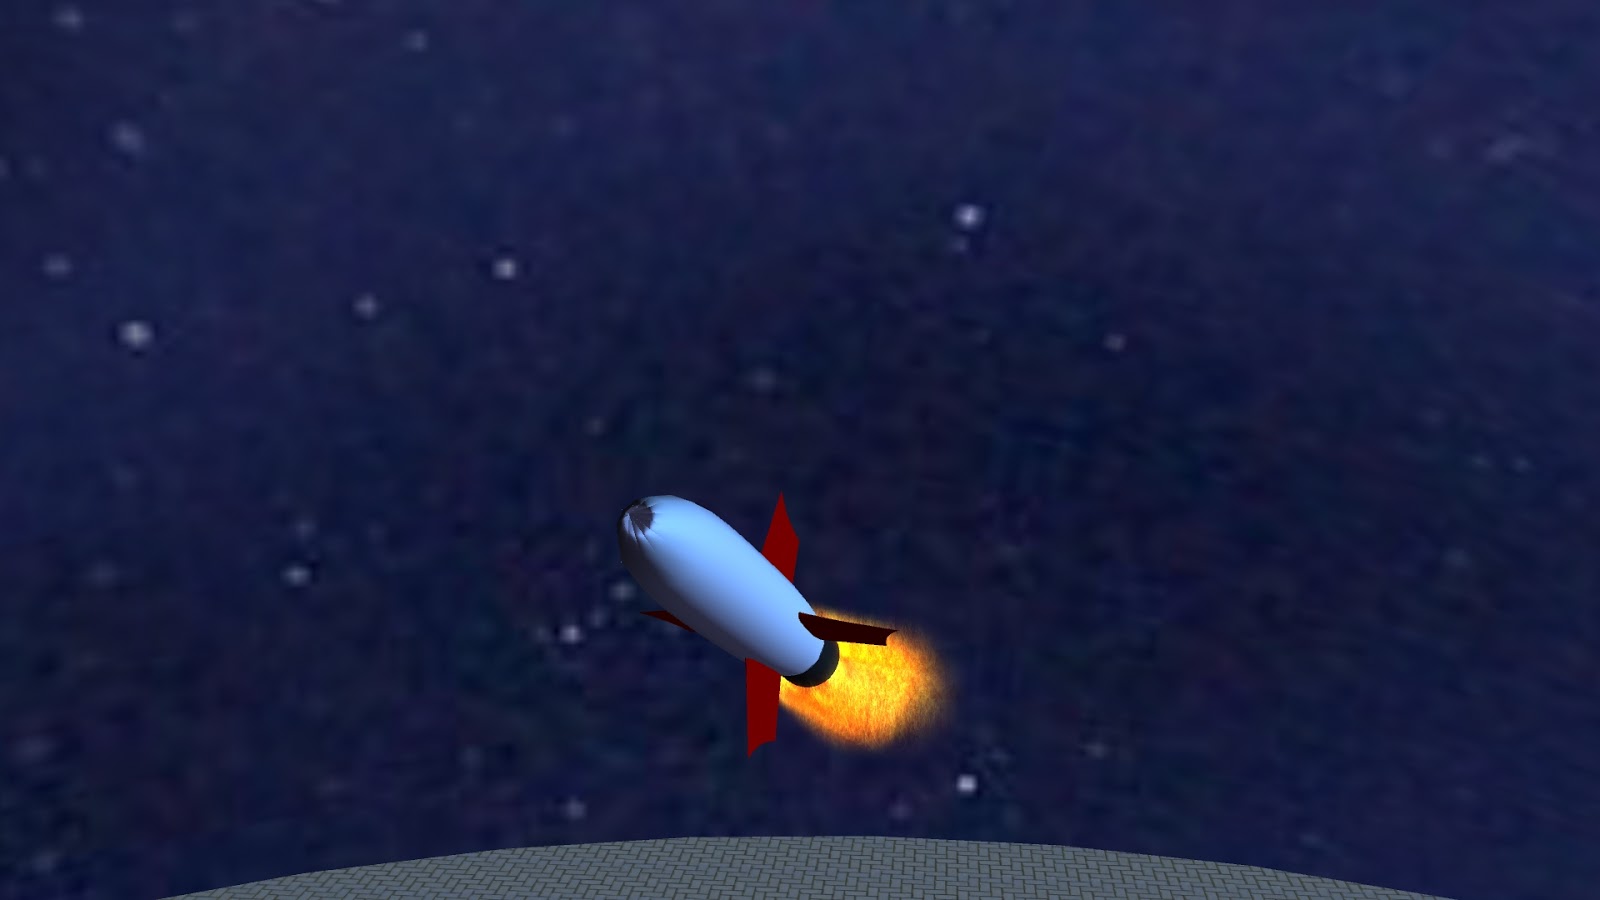
| My rocket shooting across the sky - particles will be fixed soon, was focused on getting the object itself in the alley and will fix the smoke and fire behind it when I animate it. Maya also deleted a days work on the particles. Yaaaay Maya. |
 |
| Closer up shot of the rocket. Used a curve and rotated it for the body and connected two paths and duplicated for the wings. Once again, I'll fix the particles behind it. |
 |
| What goes best with rockets? A toilet! Made it all out of polygons, took a while. |
 |
| Soon to come: it shall flush. |
 |
| Light comes from top left as well as the floor it bounces off of. The circled pillar is the source for the shadow behind it. |
 |
| Top right directional lighting, causing a shadow on the railing. Large cone angle and many different ones, so not a harsh shadow. |
 |
| Top left lighting. Semi-faded cone angle. |
 |
| Pretty soft and faded cone angle causing a light shadow with soft edges. |
 |
| Didn't get the windows in this picture, but they're casting the shadow. Very sharp edges closest to the window. |
 |
| More shadows cast by the window. Much of the light bounces off the floor and indirectly lights up its surroundings, such as the stair divider. |
 |
| Top left directional lighting, very harsh edges due to the sun being the only major |
 |
| Another shadow cast by the sun on the trashcan. Similar edges, yet there is more bounce light affecting the pavement under shadow so it isn't as dark. |
 |
| The sun is just aweesome. Ultimate shadow creator! |
 |
| Shadow cast by door. Harsh edges. |
 |
| Very soft edges due to the many light sources from aboce. |
 |
| Another soft shadow from many different light sources. |
 |
| Dark shadow in locker, cast by the top of it. Light, however, bounces off the bottom and compensates for not being pitch black inside. |
 |
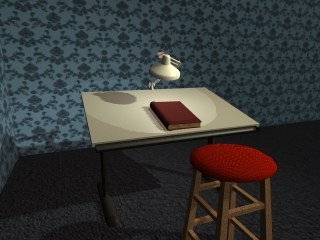
| Top right lighting casting a semi-harsh edge shadow under the table. Light bounces off the floor to soften the edges. |
 |
| Harsh edge shadow against the door with very little bounce light. |
 |
| Eye-level shot staring down the alley, now with added lighting! |
 |
| Elevated shot of the scene. |
 |
| Closer up on the back three lampposts. |
 |
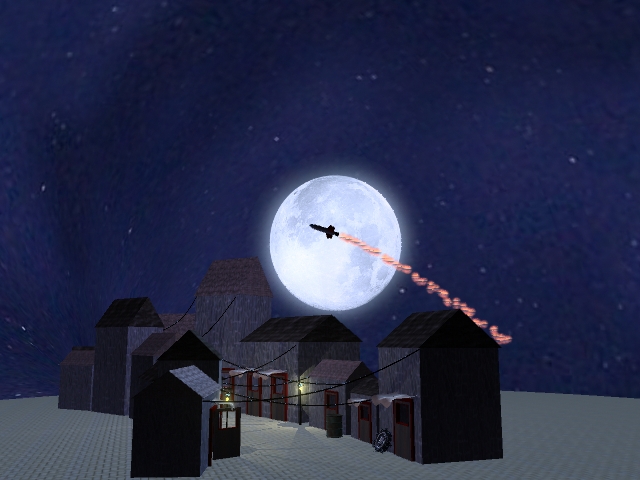
| This lamppost has center stage. By the way, if you couldn't tell, I reallly like the moon. |
 |
| Shot of a different lamp post and how it illuminates its surroundings. |
 |
| Picture of door opened at the end of animation sequence - the hardest part of animating was organizing the heiracrhial ranks of objects my town. So much clutter. |
 |
| Tire and screwdriver - textured |
 |
| Lamp post - textured |
 |
| House with door, lamp post, barrel |
 |
| Longer shot of full scene to see the sky, wires, and roofs of different houses |
 |
| Close up on rim. I really believed I was making an octopus during the tutorial, but in the ended it started to look more like a tire. There was a small discrepancy in the tutorial on the "legs" of the rim, as it had us extrude multiple times instead of one long time, which created the bridge of metal in the middle. |
 |
| Close up of treads. These were much simpler to make than the rim, especially since I only had to make one pattern and duplicate it around the tire. I like the look of these. |
 |
| Project in its en*tire*ity. Hahaha, I crack myself up. |
 |
| Handle of the screwdriver. Used booleans to cut the cylindrical holes in the sides, and simple scaling of sides for the core handle shape itself. |
 |
| Tip of the screwdriver. This one was more troublesome to get to look like the right angle and length. Overall, using booleans wasn't too bad. |
 |
| Long shot of the alley, showing the plane and part of the sphere around it. |
 |
| Closer shot of the alley, gives the view of each house with still a surrounding setting. |
 |
| A more eye-lecel shot of the alley. Lamp post isn't finished, screen shots were taken in the middle of modeling it. |
 |
| Extreme long shot consists of a view so far from the subject that they aren't even able to be seen. This can also be referred to as an establishing shot because it is gernerally used to set up where something is by its surroundings. |
 |
| A long shot shows a scene much closer to the subject than an extreme long shot to stress the more immediate surroundings, but is still a good distance away. |
 |
| In a full shot, the subject (usually a person) fills up the frame with head in the top portion and the feet in the bottom. This allows us to focus on the person while still receiving information about their location. |
 |
| A medium shot shows the subject from roughly the waist/hips up, as the setting has already been established. This is typically used for common dialogue scenes. The mid shot is generally emotionally neutral. |
 |
| A close shot is when one part of the subject (usually face) fills up almost the whole frame. This shot can be very confusing for the audience if overused, because it is not good for establishing where they are or what is going on. The most common use is to show a character's emotion as a cutaway. |
 |
| An extreme close up is used for dramatic effect, and requires a good reason to be used. This shot goes closer than the eye would normally see, and typically consists of just one part of the face such as an eye or a mouth, without a background. |
 |
| A birds eye view angle is from directly above, putting the audience in a superior position to the subject that now looks small and sometimes unrecognizable. |
| A high angle shot is less elevated than a bird's eye, but still gives the feel of the objects being smaller and less significant. These are good for establishing the setting, as the objects typically become part of it. |
 |
| A low angle shot is defined as anywhere below the eye-level and looking up. This angle makes the audince feel smaller than the subject, and is often used to make the subject look bigger and powerful. |
 |
| An eyelevel shot is exactly how it sounds - an angle in which the camera is in line with the subject's height so that he/she doesn't have to look up or down. |


